

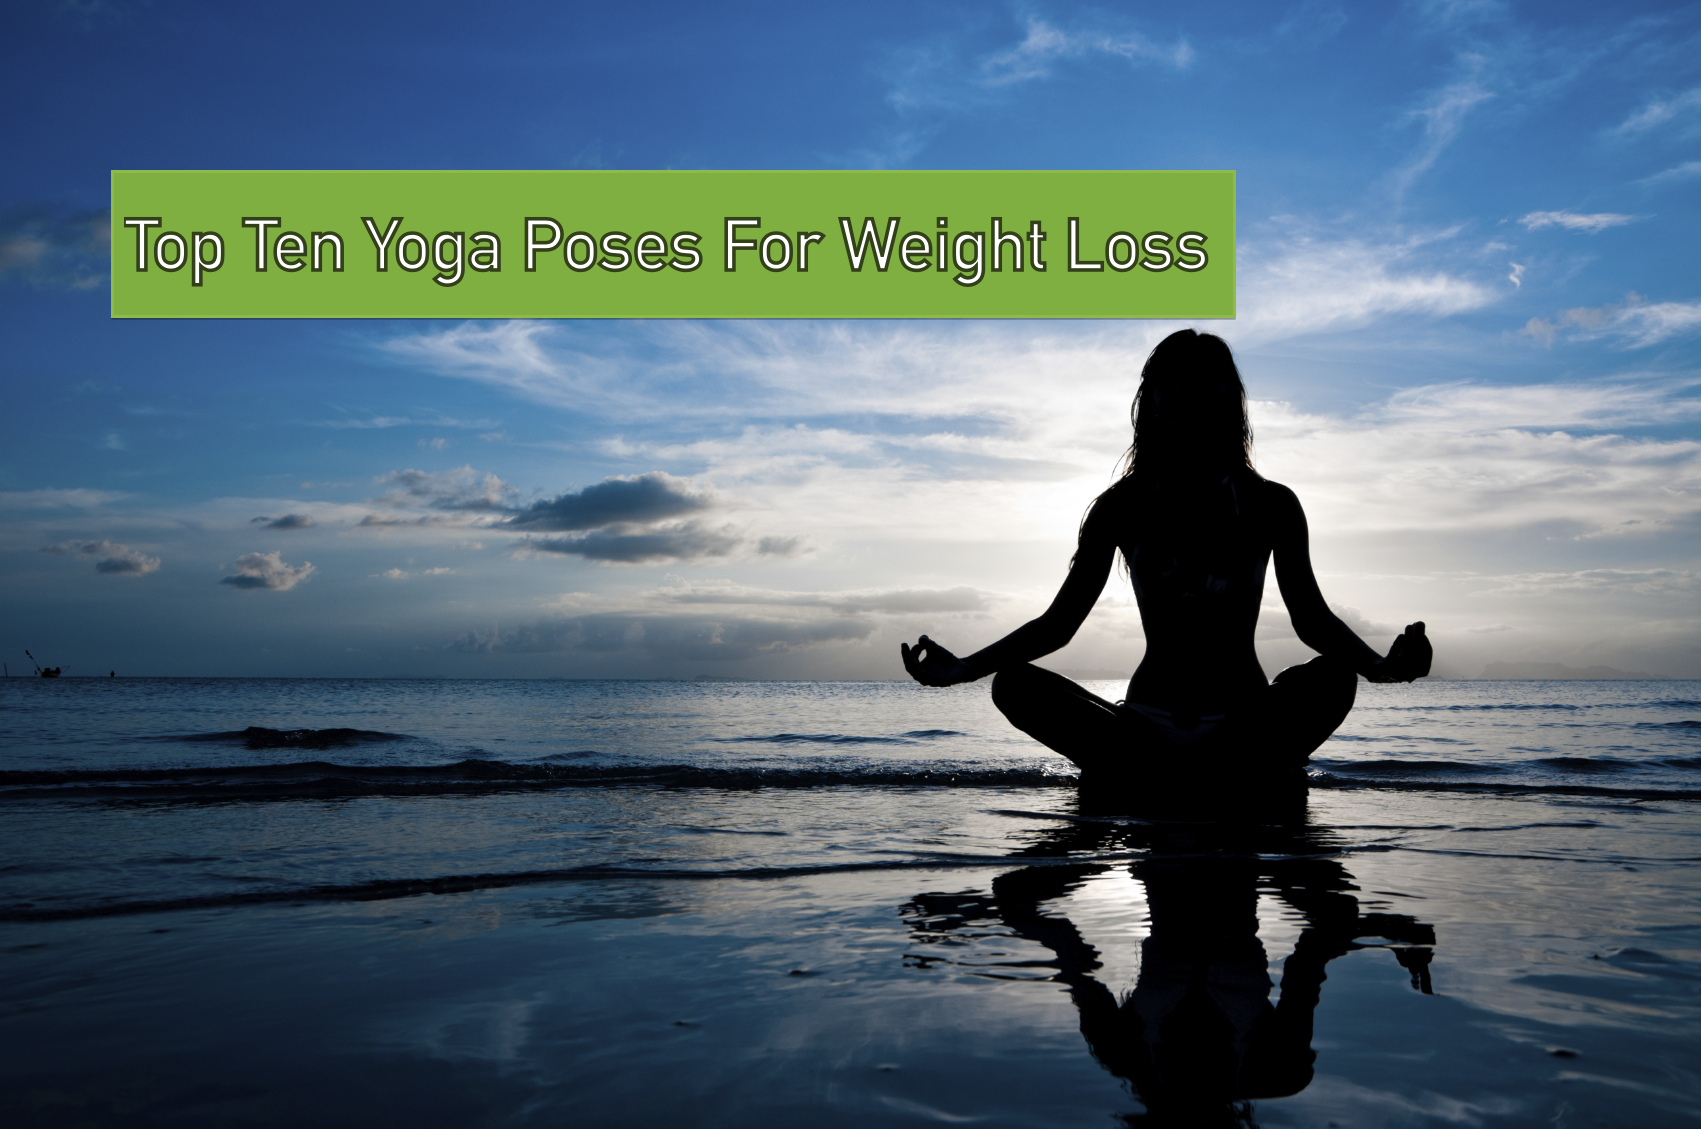
There are so many powerful yoga poses that can improve how you feel physically and mentally. With all the flow of movement to choose from, we have found ten of the most effective yoga poses for weight loss.
WHY YOGA POSES ARE IMPORTANT FOR WEIGHT LOSS
By far Yoga has shown to be a practice of incredible focus, discipline, and mindfulness. Certainly there is a lot of physical demand and benefit which we will dive into. But lets take a moment to appreciate why this physical, spiritual and mental practice has been used throughout Indian tradition dating back to early sixth century BCE.
Blasting through workouts and increasing physical strength in the weight room has its place for sure. But even the strongest bodybuilders have struggled to maintain focus and control over their minds holding only their weight in the stillness of a yoga pose.
With all the stress that lifting weights, Muay Thai Boxing, and combat sports can place upon the body and mind, it is important to aleviate that stress and release this pressure that builds up in our joints, spine, and lymphatic system. The sheer concentration alone, connecting with breathing techniques has been shown to dramatically reduce depression and anxiety.
Other benefits commonly seen in studies of those who have practiced yoga have resulted in:
- Increased flexiblity
- Muscle strength and tone
- Better energy, respiration and well being
- Improved metabolism
- Weight reduction
- Cardiovascular and circulatory health
- Improved athletic performance
- Reduced risk of injury
All of these benefits concidered c0mpliment the application of any athletic training program beautifully. So here are the top ten ten yoga poses for weight loss.
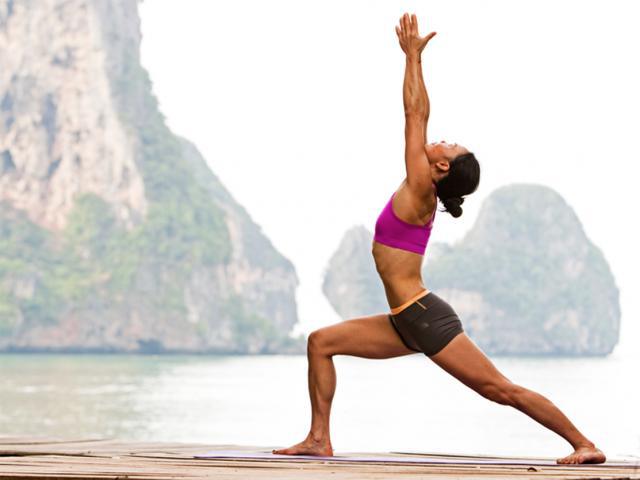
virabhadrasana I (Yoga Warrior I)
Stretching arms above the head, touch your palms together. As you do this yoga pose you want to take in a deep breath. Bend whichever leg is forward facing at the knee while keeping the back leg straight and foot planted at a 90 degree rotation. Keep your head and chest high. Hold for a couple breaths then work the other side.
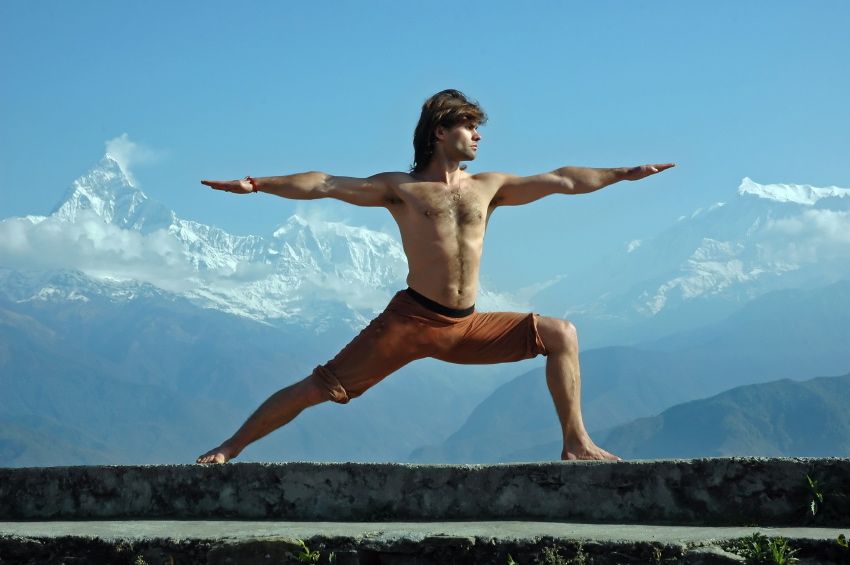
virabhadrasana II (Yoga Warrior II)
Similar to yoga warrior I, the bottom half of your body is in the same position. The difference here is that instead of directing your chest forward you move it to which ever side your back foot is pointing while keeping your arms extended parallel to your legs. Head forward. Take a couple breaths then repeat on the other side.
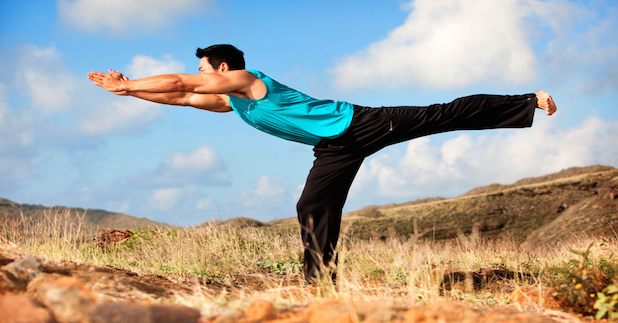
virabhadrasana III (Yoga Warrior III)
Here is where things get a little more advance and require more focus in your core. Starting in a warrior I position, push out with your back leg and extend your arms forward like a table. Open your hip to allow for the most flexibility and keep the focus and balance in your planted foot. Again, take a few breaths then repeat on the other side.
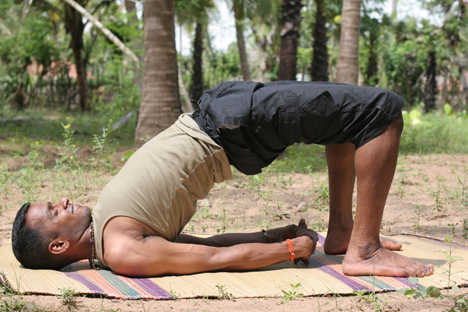
Setu Bandha Sarvangasana (Bridge Pose)
Starting position is best with your back flat on the mat and feet planted close to your butt. With arms rested by your side, push up with your torso and hold in an arched position. For an advanced move you can place your hands on either side of your head and also push up with your arms. The advanced move is called wheel. Feel that stretch and hold for a few seconds, then release back to the floor.
Nauka Chalan (Boat Pose)
You are going to feel this in your core, arms and legs in a big way. Starting in a seated position, legs extended in front of you, lift your legs and extend your arms in front of you. This will require a great amount of focus and mental agility as your whole body will begin to shake. Try to hold this through a couple deep breaths. Put all your stress into these breaths, then release.

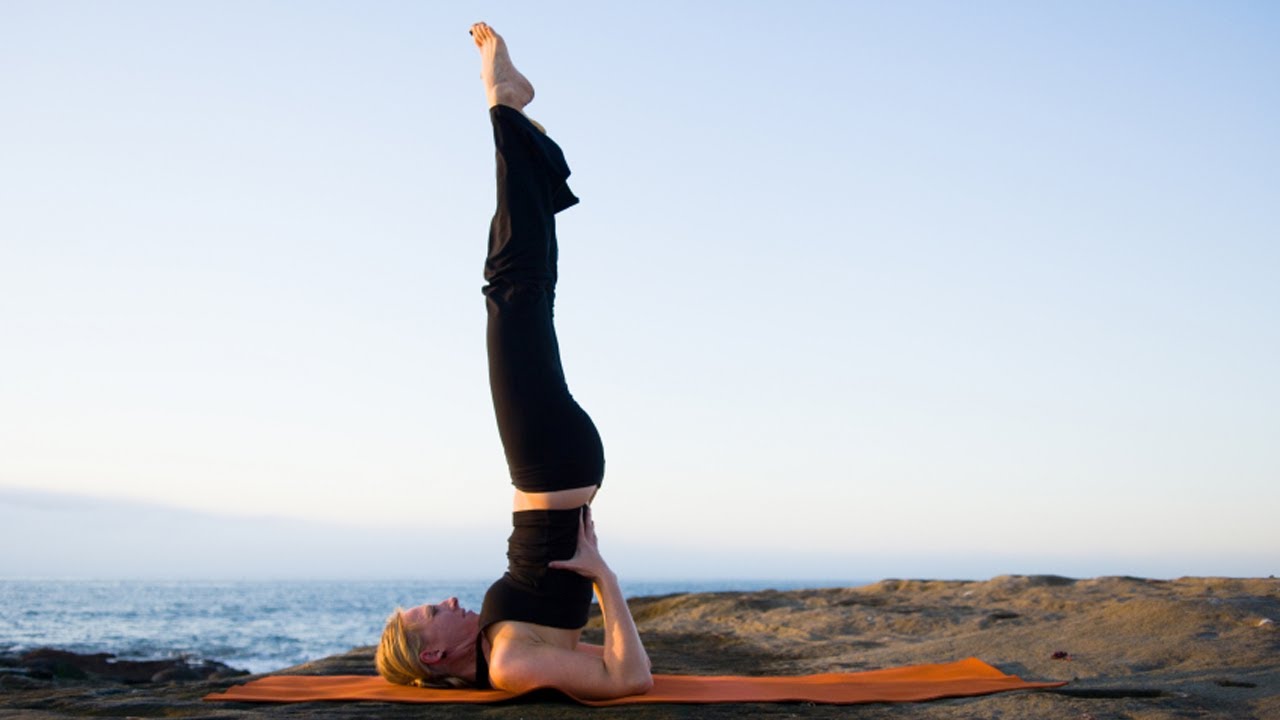
Sarvangasana (Shoulder Stand)
The safest way to begin this pose it to begin in a laying down position. As though you were about to take a nap. With your palms pressed against the mat, try to first bring your legs up near your head in a plough stance prior to lifting them at an upward angle. Use your elbow in triangle with your shoulders to create a balance and place your hands on the back of your torso to assist in keeping this pose. Hold for a few breaths then release slowly. Allow for a gentle massage of your vertebrae as you connect back with the floor.
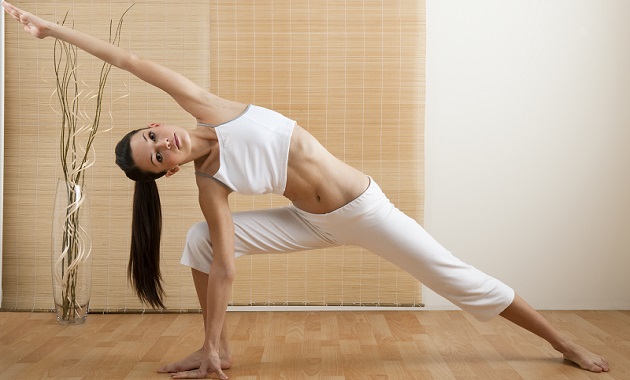
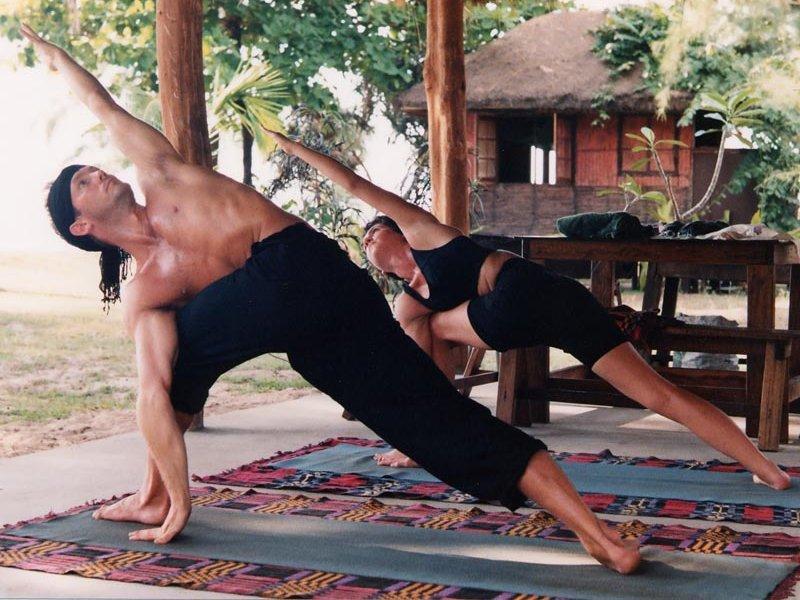
utthita parsvakonasana (Extended side angle pose)
Here we find our lower half of our bodies again in the warrior pose. One leg bent at the front by the knee and the other extended with a foot turned inward. Bring the arm adjacent to whichever leg is in front down to the floor for balance and extend the other arm out in front of you while creating a torso twist. Take deep breaths and really try to extend that arm out as much as you can. This will really release a lot of that tension built up in your core.
parivrtta parsvakonasana (Revolved side angle pose)
This is almost identical to the side angle pose above. The only difference here is that the roles of the upper body hand and arm placement is different. You want to connect opposite sides of legs to arms from what you did in the previous yoga pose. This will create some variety in your movement and allow for further stretch and mobility.
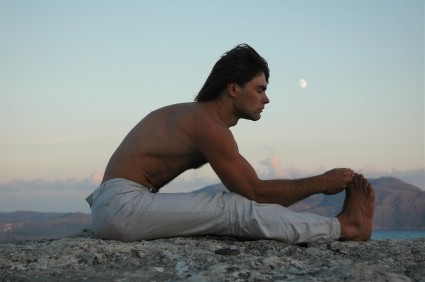
paschimottanasana (Seated forward bend)
This is a fairly simple yoga pose, but wonderful for the spine and release of tension. In a seated position with your legs extended in front of you, reach out to your toes as best you can. Do not be discouraged if you cannot touch your toes. Rome was not built in a day and neither was your body. Flexibility takes time and effort. Make minor improvements each time you do this yoga pose and sooner than later you will impress your self at the achievements your efforts have given you.
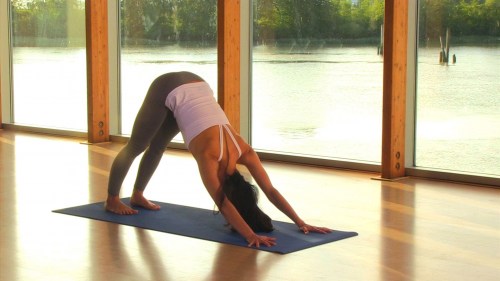
adho mukha svanasana (Downward-facing dog pose)
Careful not to pull or strain any muscles in performing this pose. This is the most traditional pose used in nearly every yoga practice as it works everything. From your shoulders on down to your calves. The best way to enter this position is by starting in a plank position. Much like the starting position for a push up. Now, push back with your arms while keeping your feet as planted to the ground as possible. Extend your arms far in front of you as though you were about to do a pike push up. Feel that stretch? Good. hold it there for a few breaths. For variation you can even bend your knees to focus the stretch from one calf muscle to the next. Come back to plank, then if you like you can even bend your knees to floor and cradle back into a child pose.
I hope you found this article on Top Ten Yoga Poses For Weight Loss helpful Subscriber to our news feed for more informative articles such as these to help you get in the best shape of your life. And come visit us at Tiger Muay Thai one of Asia’s premiere weight-loss destinations. Our dedicated team of fitness professionals will support and lead you and can help blast away that unwanted fat and get you in the best shape of your life.